How to Install a Home EV Charger in 2025: Costs, Steps, and Incentives Guide
Electric vehicles are becoming more common, and having a home charger makes owning one easier. Instead of relying on public stations, you can charge your vehicle overnight, saving time and hassle.
This post covers everything you need to know about setting up a home EV charger in 2025. You’ll learn about the different types of chargers, the steps for installation, typical costs, available incentives, and best practices to follow.
By the end, you’ll be ready to choose the right setup and get your charger installed with confidence.
Choosing the Right Home EV Charger
Picking the right charger for your electric vehicle at home is important—it affects how fast you charge and how convenient the process is. Home chargers mainly come in two levels: Level 1 and Level 2. Knowing the differences between them and understanding connector types can help you choose a charger that fits your daily driving needs and your EV’s compatibility.
Level 1 vs Level 2 Chargers
Level 1 chargers are the most basic and often come included with your EV. They plug into any standard 120-volt household outlet, so no special installation is needed. However, they charge slowly—typically adding about 3 to 5 miles of range per hour. This means a full charge might take 24 hours or more, which is fine if you don’t drive much each day or only need a slow trickle charge as a backup.
On the other hand, Level 2 chargers require a 240-volt outlet, similar to what’s used by large appliances like a dryer. These chargers deliver much more power and can add 15 to 30 miles of range per hour. For most EV owners, a Level 2 charger is the sweet spot because it can fully recharge the battery overnight.
Preparing Your Home for EV Charger Installation
Before rushing to install your EV charger, it’s crucial to prepare your home properly. This preparation helps avoid surprises during installation and keeps the process smooth. You’ll need to check your electrical system, choose the best spot for the charger, and sort out any permits or rules your local government requires. Let’s break down these key steps.
Electrical System Assessment
Start by checking if your home’s electrical panel can handle an EV charger. Most Level 2 chargers need a dedicated 240-volt circuit and draw between 16 to 50 amps, sometimes up to 80 amps for faster charging. Most homes built in recent decades have panels rated for 100 or 200 amps. If your panel is on the lower side or already pushed close to its limit, you may face a need for an upgrade.
Here’s what to do:
- Look at your main electrical panel’s amperage rating (usually printed on the panel door).
- Assess your current power usage—consider all major appliances like HVAC systems, ovens, dryers, and so on.
- If you’re unsure, hire a licensed electrician to perform a load calculation and confirm if your panel supports the charger you want.
- Consider smart load management devices that balance power between your charger and other household needs, sometimes avoiding expensive upgrades.
Upgrading your panel or service could cost anywhere from $1,000 to several thousand dollars, depending on complexity. Getting this right upfront will avoid overloads, tripped breakers, or worse.
Selecting the Installation Site
Picking the right spot for your EV charger makes daily use easier and keeps your setup tidy and safe. Ideal locations have good access, are close enough to the electrical panel to limit wire length, and usually have some form of weather protection.
Think about these factors:
- Accessibility: Place the charger where it’s easy to plug in your EV without moving the car multiple times. Garage walls, carports, or driveway-adjacent walls are popular.
- Distance from Panel: The farther your charger is from the panel, the longer (and more expensive) the wiring will be. Keep the cable length manageable to reduce voltage drops.
- Protection from Weather: If installing outside, choose a spot shielded from direct rain or sun, or select a charger rated for outdoor use with proper weatherproofing.
- Future-proofing: Leave space for potential upgrades, like adding more chargers or smart energy devices.
A well-chosen site simplifies installation and boosts your charging experience.

Photo by Andersen EV
Permits and Local Regulations
You can’t just grab a charger and hook it up—permits and codes matter here. Most areas require permits for Level 2 charger installations because they involve new wiring and power requirements.
Here’s why permits matter:
- Safety: Permits ensure qualified electricians follow electrical codes and standards, avoiding fire hazards or electrical faults.
- Legality: Properly permitted work follows local laws, helping you avoid fines or issues when selling your home.
- Insurance: Insurance companies may deny claims if chargers are installed without proper permits and inspections.
Generally, you’ll need to:
- Submit a permit application to your local building department.
- Provide details about the charger model, wiring plans, and electrical upgrades.
- Pass an inspection once installation is complete.
Permit approval typically takes anywhere from a few days to a few weeks depending on local processes. Check your city or county’s website or talk to your electrician for specific requirements.
Following the rules keeps your installation worry-free and safe for you and your home.
This preparation—knowing your electrical capacity, choosing the right spot, and getting permits—is the foundation for a smooth installation. Getting these right saves hassle and makes charging your EV a reliable part of your daily routine.
Step-by-Step Home EV Charger Installation Process
Installing a home EV charger is straightforward when you break it down into simple steps. You’ll run a dedicated circuit, mount and wire the charger, then perform final tests to make sure everything works safely and efficiently. Doing it right means your charger runs smoothly, protects your home’s electrical system, and gives you reliable daily charging. Here’s a clear path to get you there.
Running a Dedicated Circuit
Before you can plug in your charger, your electrical panel needs a dedicated 240-volt circuit just for the EV charger. This circuit handles the extra power your charger demands without tripping breakers or causing issues with other appliances.
Here’s how this usually goes:
- Select the right breaker: Most Level 2 chargers need a breaker rated between 30 and 50 amps. Your electrician will pick the exact amperage based on your charger’s requirements and your home’s panel capacity.
- Install the breaker: The panel gets a new 240V double-pole breaker, which connects to your home’s main power supply.
- Run the wiring: From the panel, electrical wiring (typically 6 or 8-gauge wire, depending on amperage) is routed out to where you want your charger installed. This wiring often runs behind walls or through conduits to keep it safe and neat.
- Safety first: The dedicated circuit means your charger isn’t sharing power with anything else. This setup reduces the risk of overloads and meets electrical codes.
This step is a key reason why most people hire licensed electricians. Proper breaker installation and wiring protect your home and ensure your EV charger is reliable.
Mounting and Wiring the Charger
Once power is ready at the charger’s location, it’s time to mount the unit and hook it up.
Follow these best practices:
- Secure mounting: Use the mounting bracket provided by the charger manufacturer. Secure it firmly into a wall stud or solid surface so the charger stays put. If you’re mounting outside, check for weatherproof options and suitable height placement (usually about chest level).
- Connect the wiring: The charger will have either a hardwired connection or a plug-in style. For hardwired chargers, connect the wires to the breaker circuit with proper grounding and according to the charger’s wiring diagram.
- Check code rules: All electrical connections must comply with the National Electrical Code (NEC) and local electrical codes. This includes using the right conduit, wire type, and grounding methods.
- Safety checks: Ensure all connections are tight and insulated. You don’t want any exposed wires or loose terminals.
Taking your time during mounting and wiring helps avoid future risks like electric shocks or fires. Think of it as building a secure home base for your charger.

Photo by Antoni Shkraba Studio
Testing and Final Setup
With the charger mounted and wired, finish up by testing everything before regular use.
Here’s what to do:
- Turn on the power at the main panel. Make sure the new breaker is switched on.
- Use a voltage tester at the charger terminals to confirm the circuit is live and delivering the correct voltage.
- Power up the charger and check for any status lights or error indicators on the unit.
- Connect your EV and start charging. Observe the charger’s behavior; it should begin charging without interruption or fault codes.
- Monitor initial charging time to verify the charger is delivering the expected power.
If anything seems off, don’t hesitate to call your electrician for a quick check. Once tests are complete and everything runs smoothly, your home EV charger is good to go.
This final step guarantees your investment works safely and reliably every time you plug in.
Following this step-by-step process gets your home EV charger installed correctly while protecting your home and keeping things simple. With a dedicated circuit, solid mounting, and thorough testing, you’ll enjoy hassle-free charging that fits right into your daily routine.
Read Also: How To Maximize EV Battery Life in 2025: Easy Tips for Longer Range and Lower Costs
Costs, Incentives, and Financial Considerations
Getting a home EV charger installed is an investment, but knowing the typical costs and incentives available in 2025 helps you plan wisely and save money. This section breaks down what you’ll likely spend, from buying the charger to upgrading your home’s electrical system, and explains the federal and state incentives that trim those costs.
Installation and Equipment Costs
When it comes to setting up a home EV charger, your total costs depend on the charger model, installation complexity, and any needed electrical upgrades.
- Charger price: Level 2 chargers usually cost between $300 and $800. Higher-end models with smart features or faster charging may cost more.
- Installation: Labor and wiring generally run from $500 to $1,500, but this varies. A simple install near your panel is cheaper; longer cable runs increase costs by about $10 to $20 per foot.
- Panel upgrades: If your electrical panel can’t handle the added load, upgrading it can add anywhere between $1,000 and $3,000. Many newer homes have sufficient capacity, but older homes might require an upgrade to 200 amps or adding a sub-panel.
- Additional wiring or conduit: Depending on your home’s layout, adding wiring or conduit can boost costs by a few hundred dollars.
- Permits and inspections: These fees usually total around $100 to $300, depending on local requirements.
In total, the full price tag for the equipment and installation usually falls somewhere between $1,000 and $3,000. Getting a licensed electrician to assess your home upfront can help prevent surprises and ensure a safe, proper setup.
Federal and State Incentives for 2025
Thankfully, incentives make installing a home EV charger much more affordable in 2025. The federal government offers a 30% tax credit for the charger hardware and installation costs combined, capped at $1,000.
Here’s how you can maximize savings:
- Federal tax credit: You can claim 30% of your total purchase and installation costs, up to $1,000, on your federal income tax return. This credit applies to chargers installed at your primary residence and covers materials and labor.
- State rebates and credits: Many states offer additional rebates ranging from $100 to $500 or more. Some programs also offer utility-based incentives or time-of-use billing credits to lower your long-term electricity costs.
- Local and utility incentives: Check if your city or power provider has extra perks, such as discounted charger units, reduced permit fees, or free installation offers.
- Income qualifications and limits: Some states prioritize incentives for low- to moderate-income households or limit eligibility to specific electric models or charger types.
You don’t have to juggle this alone. Many installers help with incentive paperwork to make sure you get every dollar possible back. Combining these financial benefits cuts the upfront cost significantly, making home charging a more attractive choice.
By understanding these costs and incentives, you can budget accurately and take full advantage of programs designed to make owning an EV easier and cheaper.
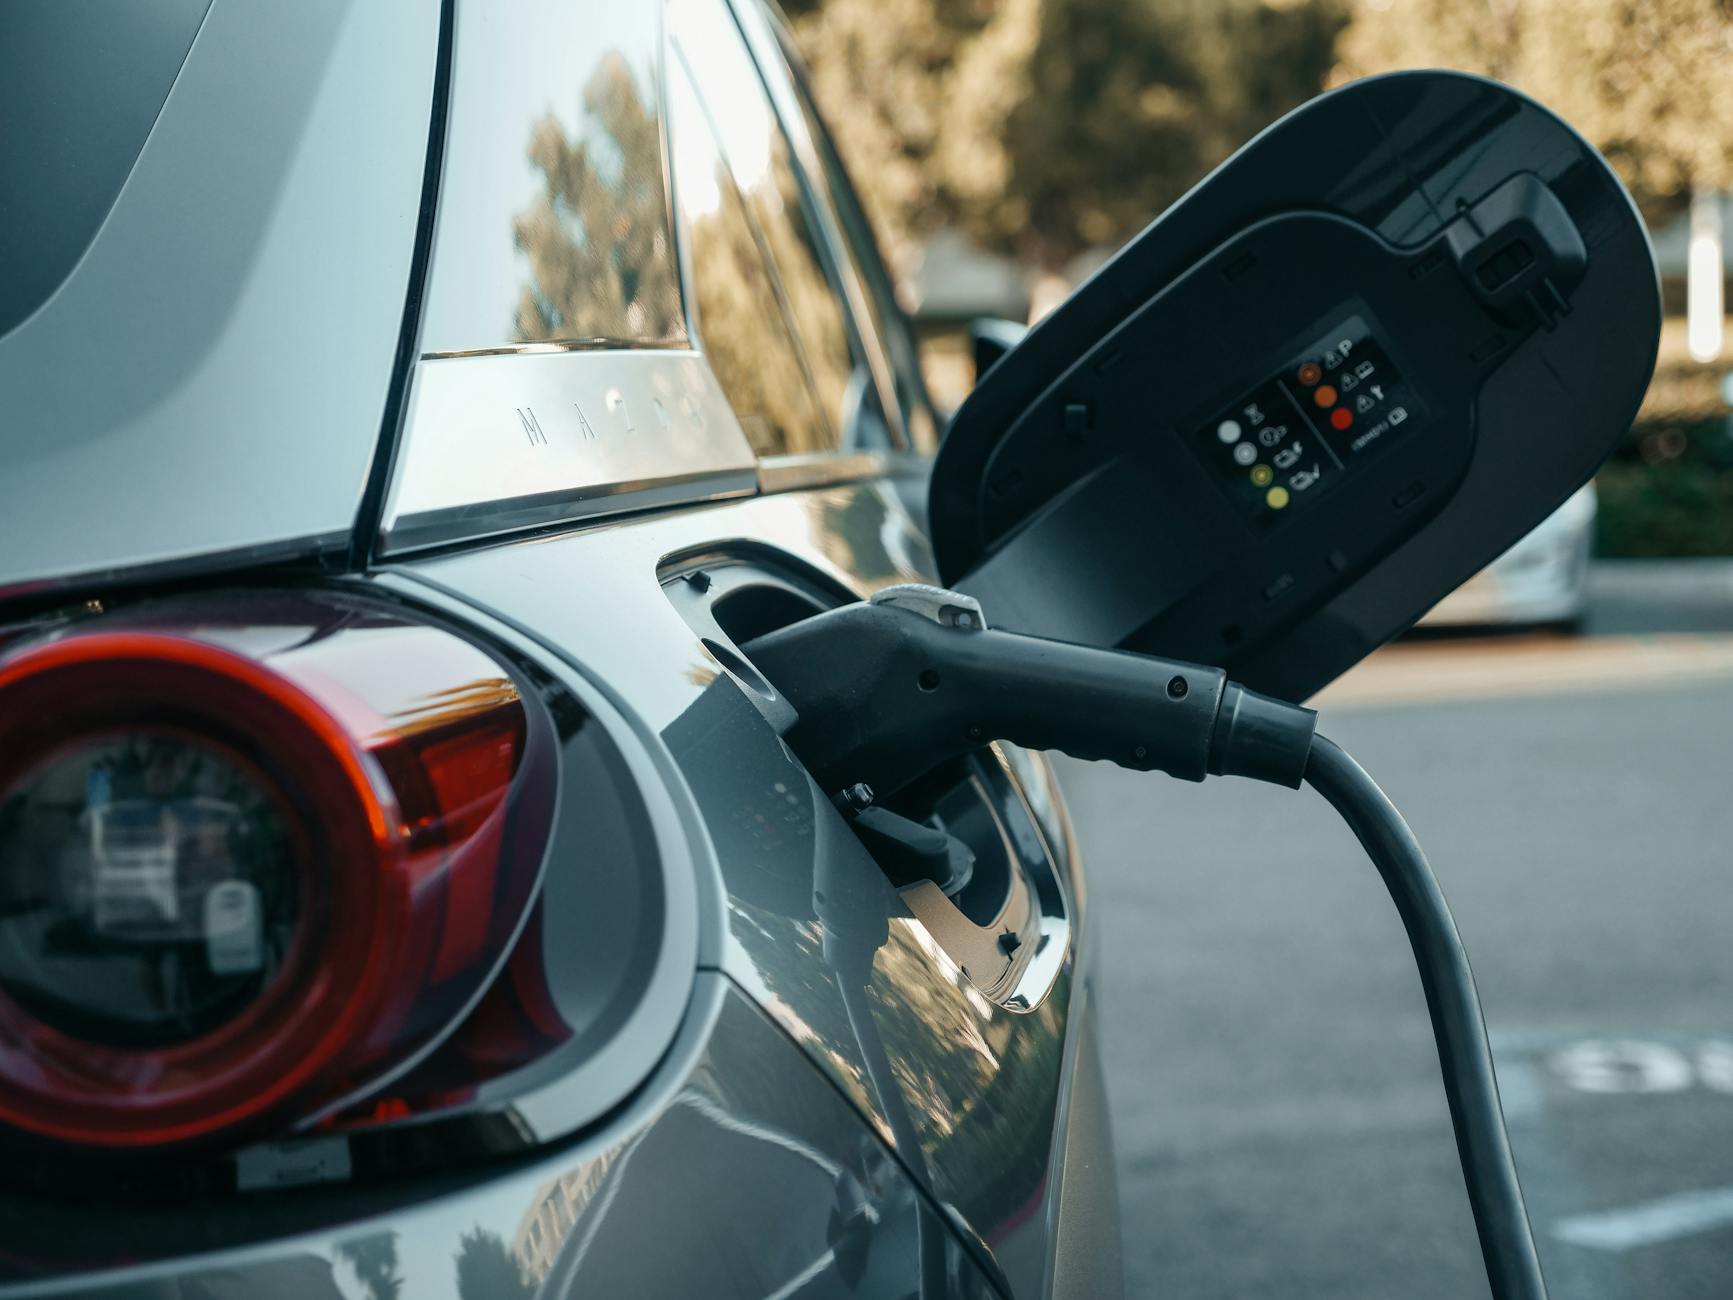
Photo by Kindel Media
Maintaining and Optimizing Your Home EV Charger
Taking care of your home EV charger goes beyond just plugging in your vehicle. Regular upkeep keeps it safe, efficient, and ready for daily use. Like any important home equipment, your charger benefits from a little attention over time. This section will help you understand simple but effective ways to protect your investment and get the most out of your home charging station.
Routine Charger Inspection and Cleaning
Your charger faces daily wear from outdoor elements, handling cables, and frequent use. Keeping an eye on it prevents small problems from turning into big headaches.
Here’s what to inspect regularly:
- Cables and connectors: Look for cracks, cuts, or frayed wires. Damaged insulation can expose wires and create safety risks. Check connectors for bent pins, corrosion, or dirt buildup. Clean them gently if needed.
- The charger unit: Check for cracks or damage to the housing. Make sure mounting brackets are secure and the unit isn’t loose or wobbling. Also, verify the unit remains dry and dust-free.
- Cable management: Store cables neatly after charging. Avoid tight bends, kinks, or placing heavy objects on the cable, which can wear it out faster.
- Environmental factors: If your charger is outdoors, check that it’s shielded from heavy rain, snow, or direct sunlight as much as possible. Remove leaves, debris, or dirt that might interfere with cable ports or vents.
For cleaning, a dry cloth or a slightly damp cloth works best. Avoid harsh chemicals or sprays near connectors and electronics. Use a soft brush or Q-tip to clear dust from the charging port and plugs. This simple care extends cable life and keeps the charging connection solid and safe.
Routine checks can take only a few minutes but save you from costly replacements or hazards down the line. Think of it like changing oil in your car — some small effort keeps everything running smoothly.

Photo by Andersen EV
Firmware Updates and Connectivity
If you have a smart EV charger, staying up to date with firmware is key. Firmware is the software that runs your charger — it controls how the charger talks to your vehicle, manages energy use, and communicates with apps or the grid.
Why updates matter:
- Bug fixes and security: Updates close security gaps and fix glitches that might cause your charger to stop working properly or expose it to hacking risks.
- Compatibility: New vehicle models or charging standards often require updated software to charge correctly and safely.
- Performance improvements: Updates may boost charging speed, improve energy efficiency, or add new features like scheduling, remote start/stop, or cost optimization.
- Remote diagnostics: Many smart chargers can report status or problems automatically. Keeping software current helps troubleshoot issues faster and avoid downtime.
Check your charger’s app or manufacturer website regularly for update notices. Many models offer automatic updates over Wi-Fi or cellular networks, so you don’t have to lift a finger once set up.
Using app-based controls can also save money. You can schedule charging to off-peak hours, track energy use, or integrate solar power systems directly. This gives you control over when and how your EV charges.
Keeping your charger’s software sharp is like keeping your phone updated — it makes sure the system runs smoothly, stays secure, and evolves as technology changes. Don’t miss out on features and fixes that keep your home charging experience hassle-free and efficient.
With a little routine care and keeping your charger’s software updated, you protect your investment and enjoy smooth, safe charging every day. These steps are easy but make a big difference in how reliable and cost-effective your home EV setup stays over time.
Conclusion
Setting up a home EV charger brings convenience by letting you charge your vehicle overnight, saving you trips to public stations and waiting time. It also lowers your long-term costs since electricity is cheaper and more stable in price than gasoline, especially when you charge during off-peak hours. Plus, using your own charger reduces your carbon footprint, especially if paired with renewable energy, supporting cleaner air and a greener future.
Take the time to assess your home’s electrical capacity, pick a good location, and follow local rules for a safe installation. These steps ensure your charger works well and lasts for years. Installing a home EV charger is a smart way to make electric vehicle ownership easier, more affordable, and more sustainable.
Thank you for reading—now it’s your turn to power up your EV charging at home and enjoy the benefits every day.

